EasyPal for Digital Slow Scan is a Windows application used to send files from one Ham to another. In most cases the file contains the location of an image on a file server that both Hams can access using EasyPal on their respective PC's.
There are 3 basic steps to the transfer process.
EasyPal sends the image file to a file server via the internet keeping track of its location.
Then the location(URL) of the file is encoded and sent via amateur radio to the users on an agreed upon frequency.
The received signal is decoded by EasyPal giving the location on the server. Using that location the file containing the image is recovered and displayed to the users.
The transmitted signal uses an international standard protocol known as DRM which is an acronym for Digital Radio Mondiale. The actual modulation used is OFDM, Orthogonal Frequency Division Multiplex.
Probably Too Much Information so let's get started.
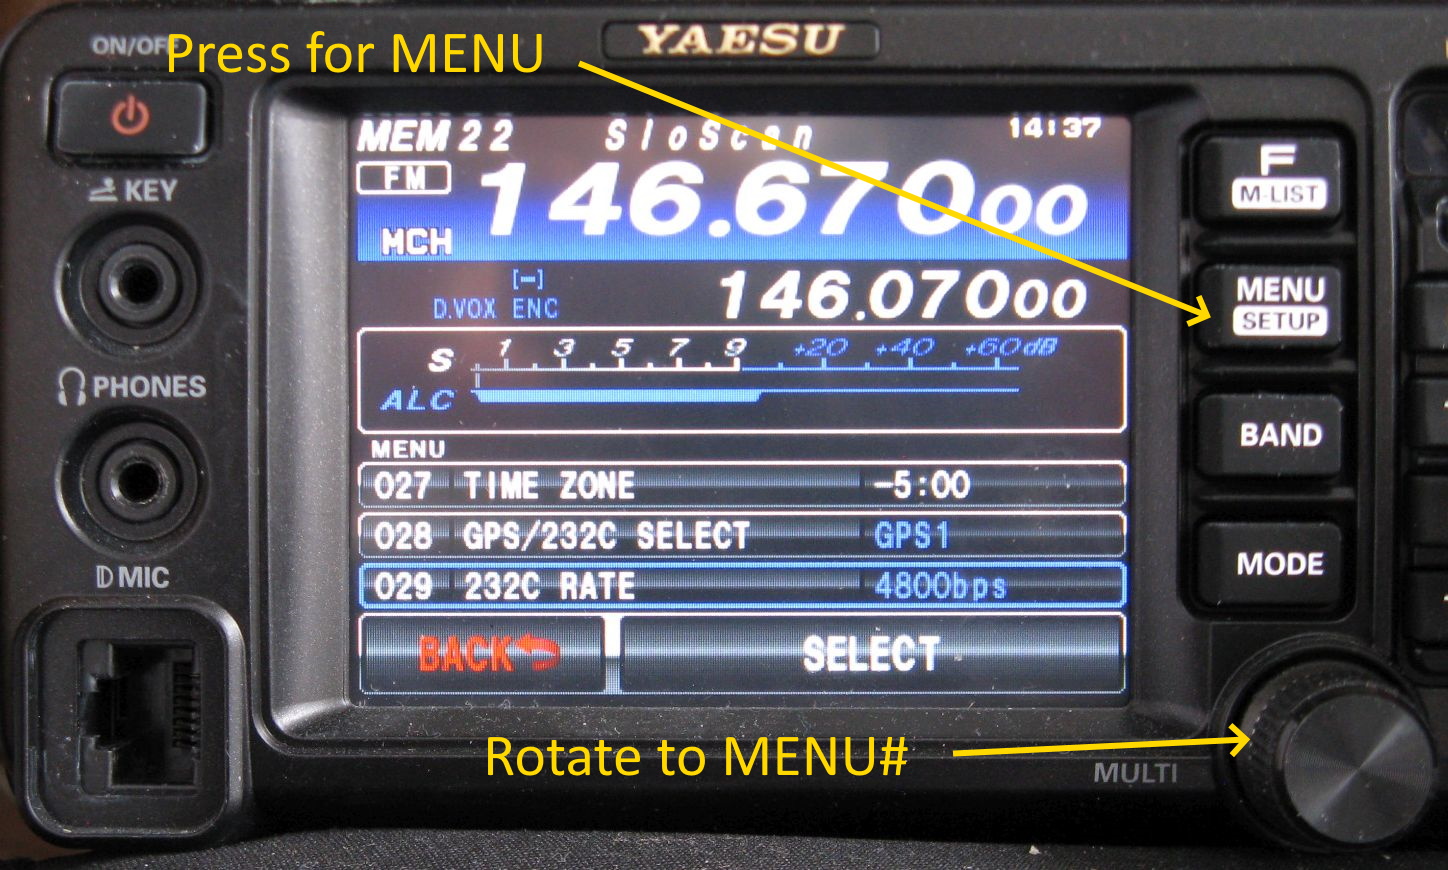
| Menu# | Menu Function | Value | Notes: |
|---|---|---|---|
| 027 | Time Zone | -5 | This depends on where you live. |
| 072 | Data Port Select | USB | |
| 077 | FM PKT Port Select | USB | |
| 081 | RPT Shift | 50mhz | 500KHZ If using 6 Meters. |
| 142 | VOX Select | DATA | |
| 143* | Data VOX Gain | 40 |
These are the ONLY values I changed from default
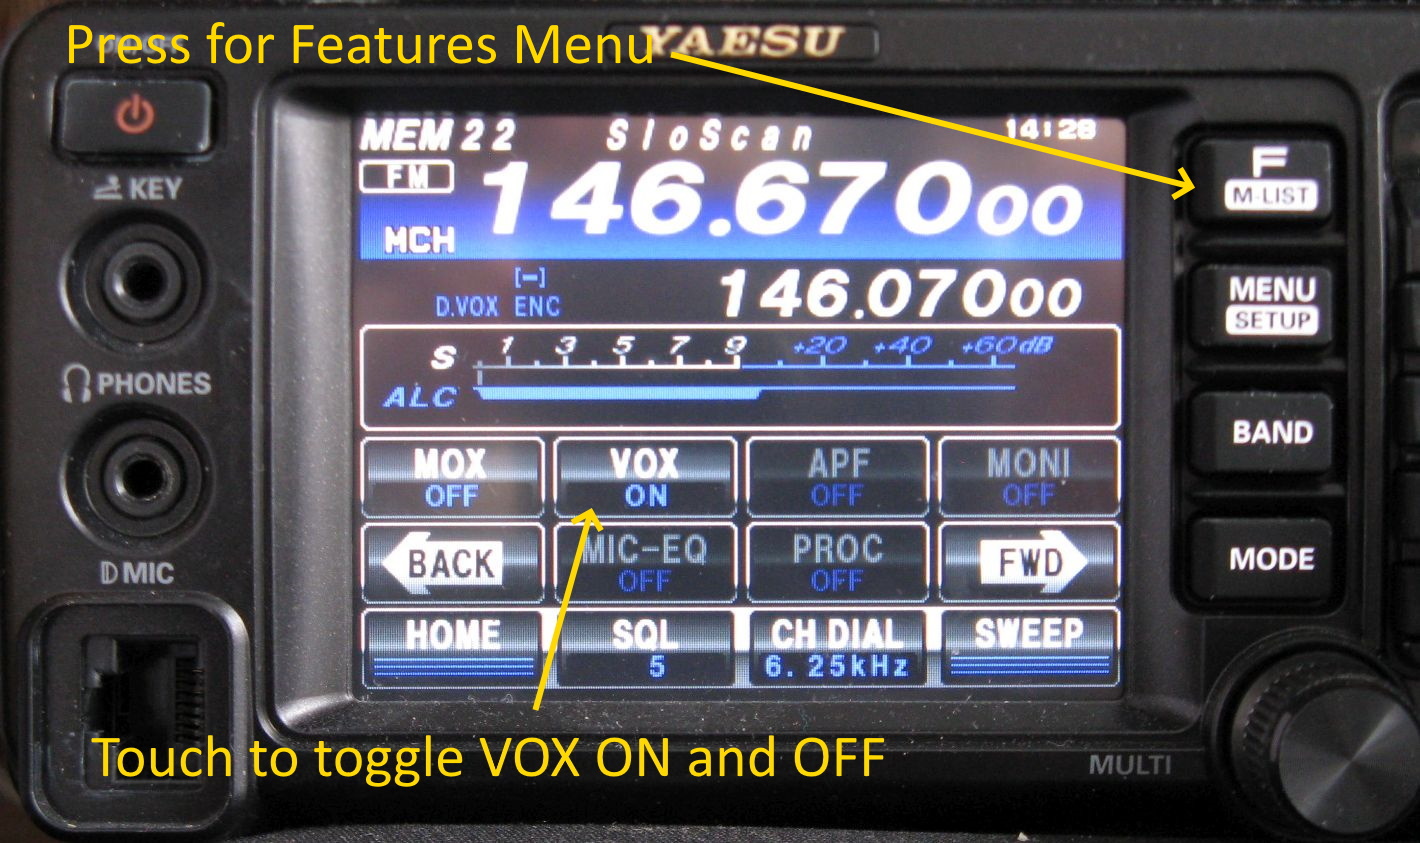
Once you are in the Function Menu, use the BACK or FWD arrows to find VOX.
Touch it to turn VOX on.
That's it. The radio is now ready to transmit and receive the DRM data. Using the MENU values above & setting VOX to 'ON' only turns on VOX during data transmission. The Microphone will work normally.
Back in the 'Old Days' computers recorded and played back sound with a device called a Sound Card that you plugged into the Mother Board. Sound cards are like Hen's Teeth any more but we still use the name to refer to the chip in our computers that performs Digital to Analog (DAC) and Analog to Digital (ADC) conversion.
In the Communications World these devices are usually referred as CODEC's and are found in SignaLinks, RigBlasters and the like. Though they are no longer 'Cards' but 'Chips' we still call them "Sound Cards".
Internally your computer works with digital information, 1's and 0's, as does the Internet. But our radios transmit and receive analog energy so we use these "Sound Card" devices to convert from digital data to analog signal at the transmit end and from analog signal to digital data at the receive end.
When Yaesu designed the FT-991 they included a "Sound Card" in the radio to act as a CODEC allowing all communication between the PC and radio to take place over a single USB cable, eliminating any need for an interface.
First you will need the USB drivers which normally are included with your Windows 10 installation. If not, they can be downloaded from Yaesu's web site. You can find them under the Files Tab for the FT-991.
Once you have the USB drivers on your PC, one way or the other, you can connect the FT-991A to your PC using a USB-A to USB-B cable. If all is well, Win 10 should indicate that it has discovered your radio, installed the appropriate drivers and is ready to go.
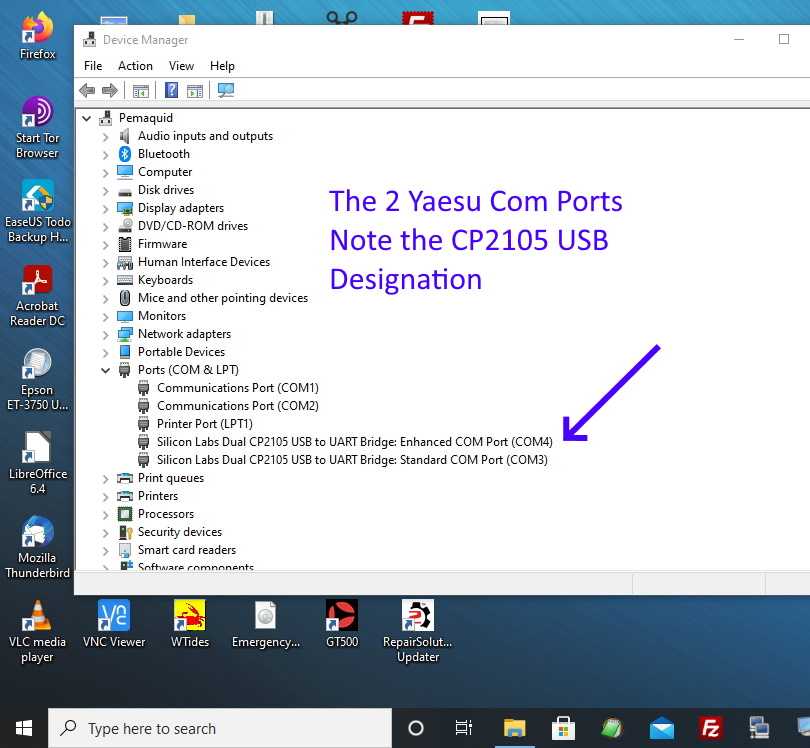
Now if you Right-Click on the little window in the lower left corner of the screen a box will pop up and in it you will find the 'Device Manager'.
Click on 'Device Manager' and its window will open. Look for 'Ports(COM & LPT)' and Click on it.
This will bring up several lines, two of which should be 'CP2105 USB to UART' bridges. One Enhanced and one Standard. If you find that line, things are looking good and close the Device Manager.
In the lower right corner of the display, you will find a speaker icon. Right-Click the icon and a box will open.
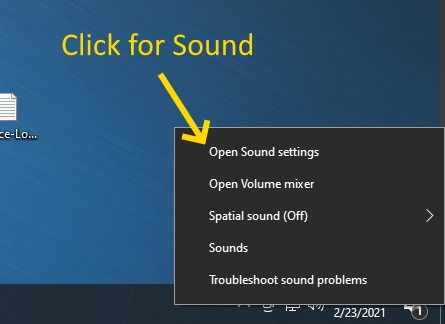
Click on 'Open Sound Settings' and the Sound window will open.
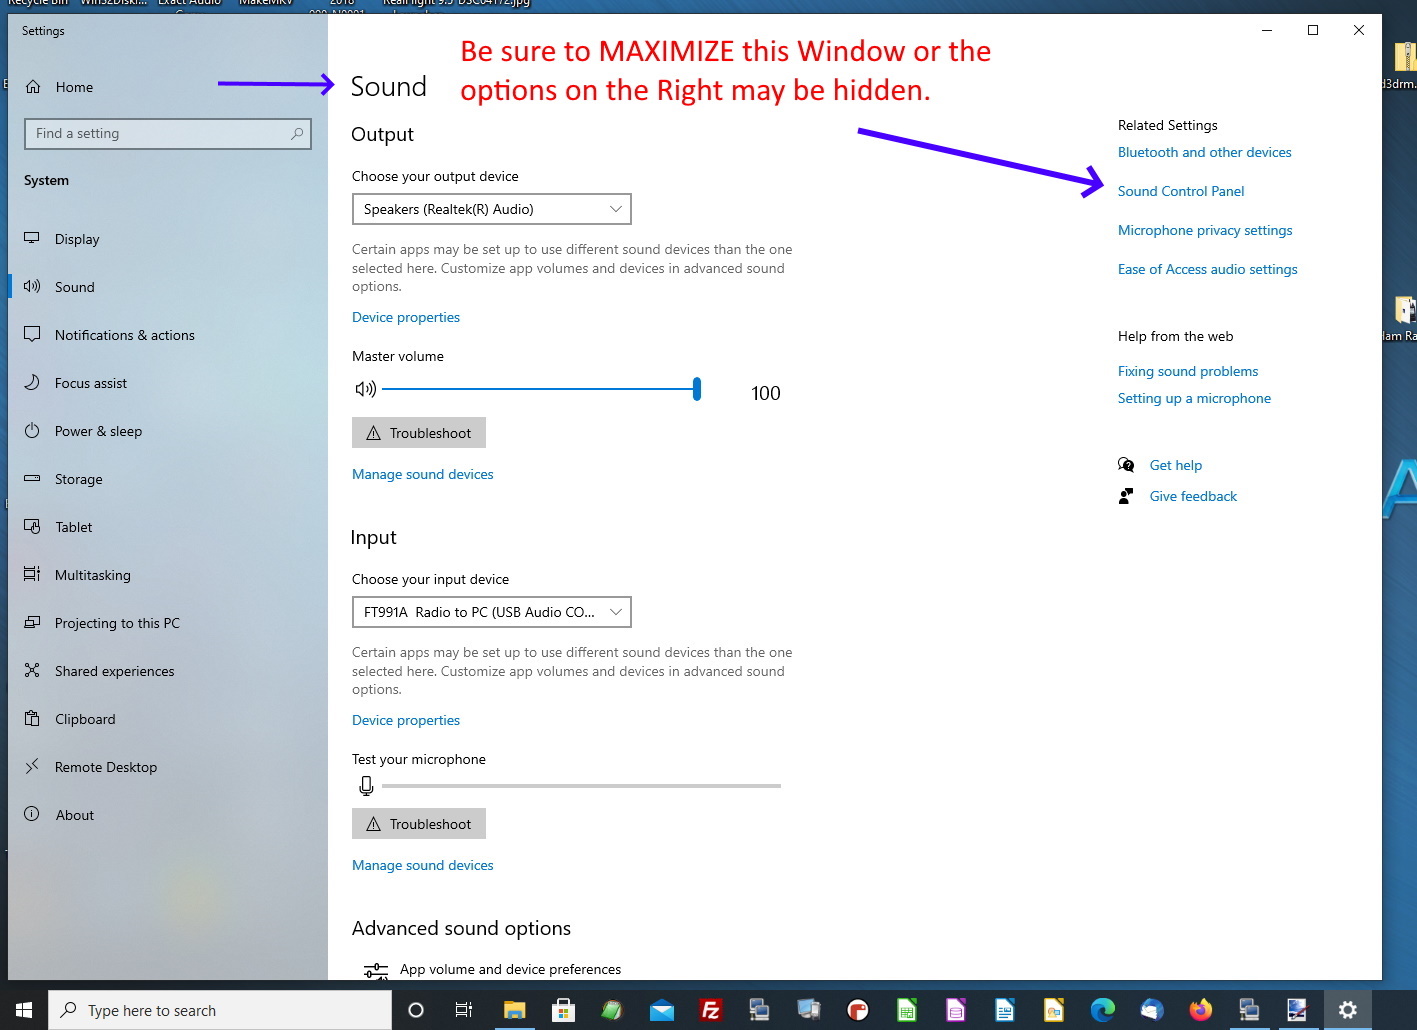
Be Sure to Maximize this window!! To the upper right of the window Click on 'Sound Control Panel' and a small window containing 4 tabs will open.
This Tab controls output from the PC. Here you can select the various Playback (Output) devices associated with your PC. The devices of interest to us follow.
[ Speakers ] ... Controls the audio output to your speakers, headphones etc. This device should be marked Default and display a Green Dot with a check.
[ USB audio CODEC ] ... Controls digital audio data to the radio via the USB cable. This may or may not be marked as the Default Communications Device.
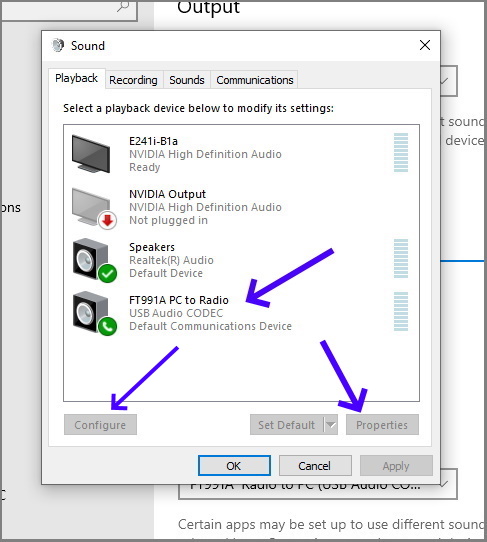
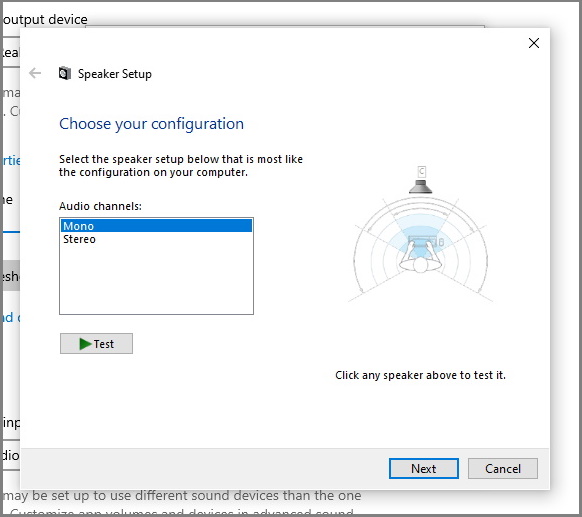
Click the CODEC device to select it and then click 'Configure' in the lower right corner opening a new window.
In this window select 'Mono'. This will not affect the PC's Audio output, just the USB to the radio.
Click 'Next' then 'Finish' to close the window.
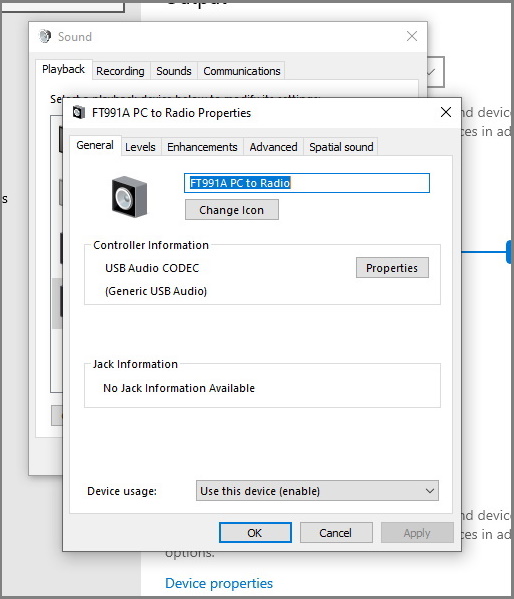
Next click Properties in the lower Left corner of the window. This will bring up another window with 5 tabs as follows.
[ General ] ... here you can change the name of the device. I changed mine to 'FT991A PC to radio'.
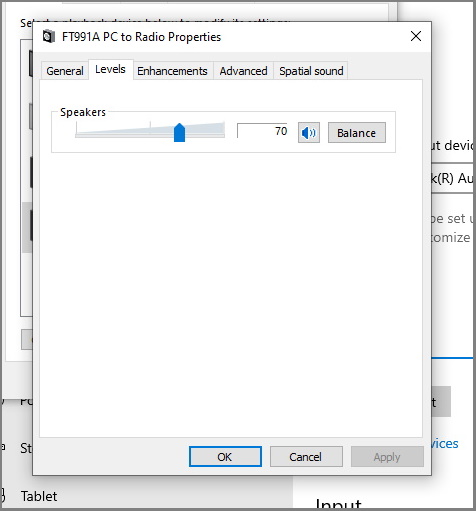
[ Levels* ] ... Set the level to 70. If you go much lower the PC will not key the radio.
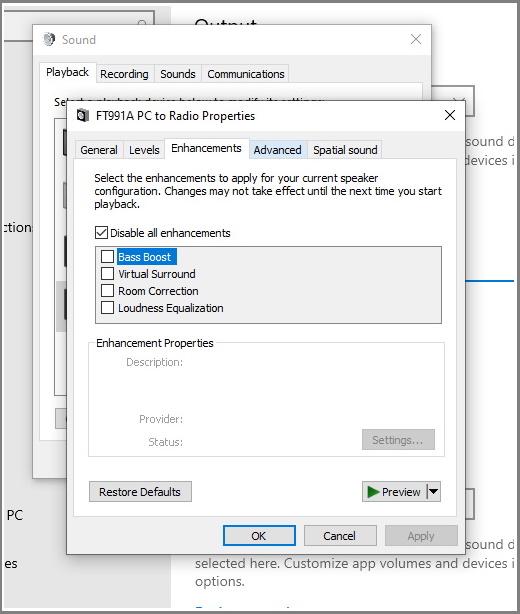
[ Enhancements ] ... You should check 'Disable all enhancements'.
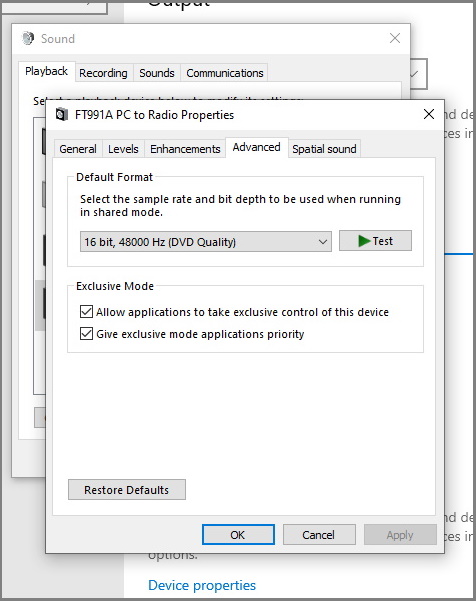
[ Advanced ] ... Select '16 bit 48000 Hz' and check both boxes below that.
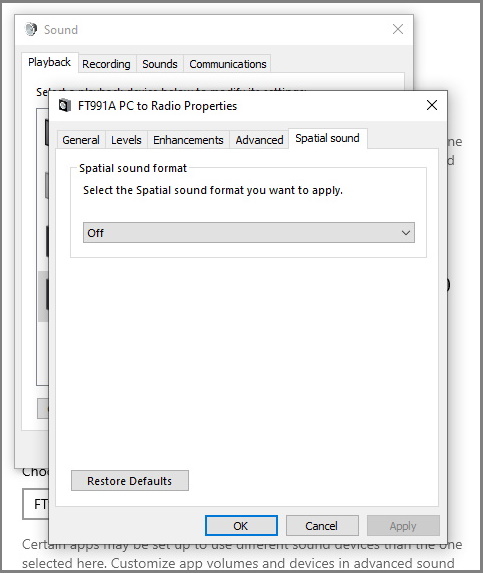
[ Spatial Sound ] ... Select 'Off'
Controls the input to the PC. Here you can select the various Recording (Input) devices associated with your PC. The devices of interest to us are as follows.
[ Microphone ] ... Line In and Stereo Mix which will most likely show Disabled or Not Plugged In. Not used here.
[ USB Audio CODEC ] ... This should be your Default Device unless you are using one of the other devices above. This may also show as 'Microphone' but USB Audio CODEC will show somewhere in this box.
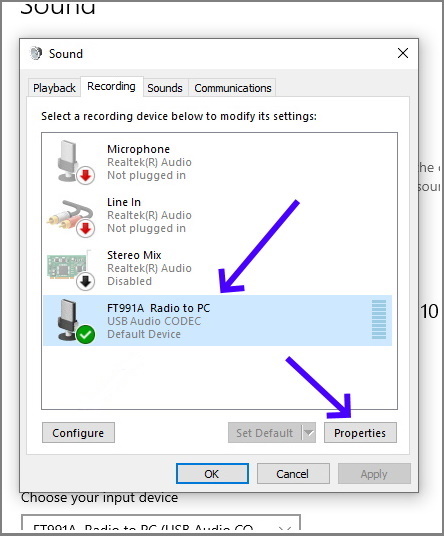
Next click 'Properties' in the lower Left corner of the window. This will bring up another window with 4 tabs as follows.
[ General ] ... here you can change the name of the device. I changed mine to 'FT991A Radio to PC'.

[ Listen ] ... Here you should leave everything as is.
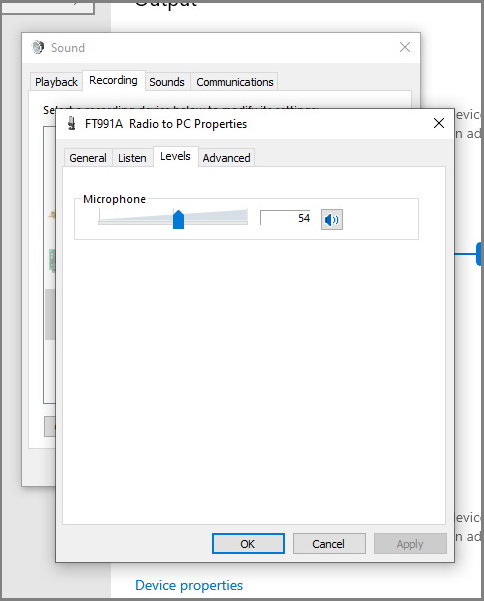
[ Levels* ] ... Here set the level to 54.
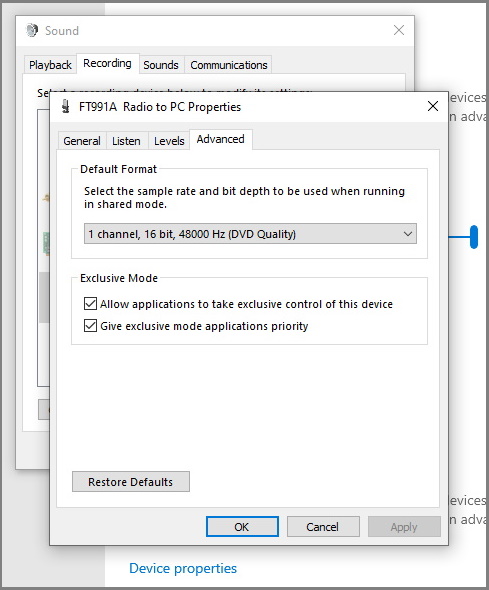
[ Advanced ] ... Select '1 Channel 16 bit 48000 Hz' and check both boxes.
No changes should be necessary.
No changes should be necessary.
Go to www.easypal.org to download and install EasyPal. 'EasyPal-07-OCT-2014-Setup.exe' is the latest and probably be the last version since the author, Erik VK4AES, became a Silent Key as of March 15, 2015.
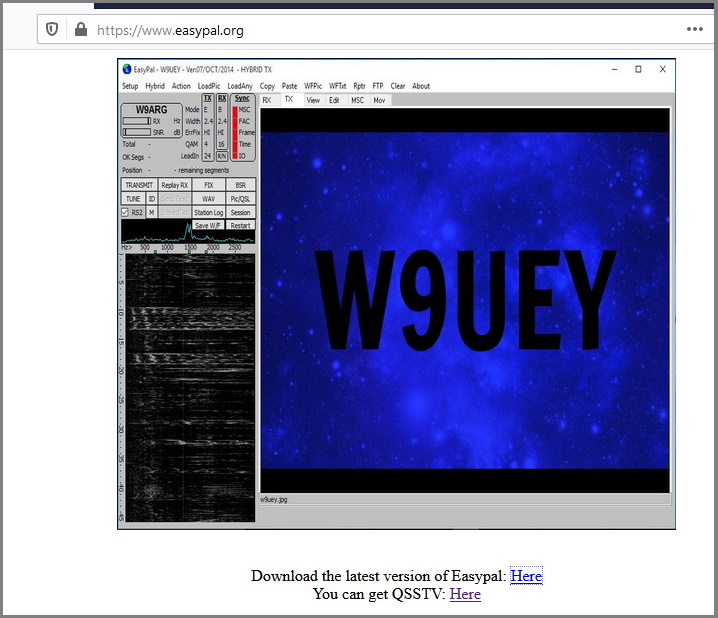
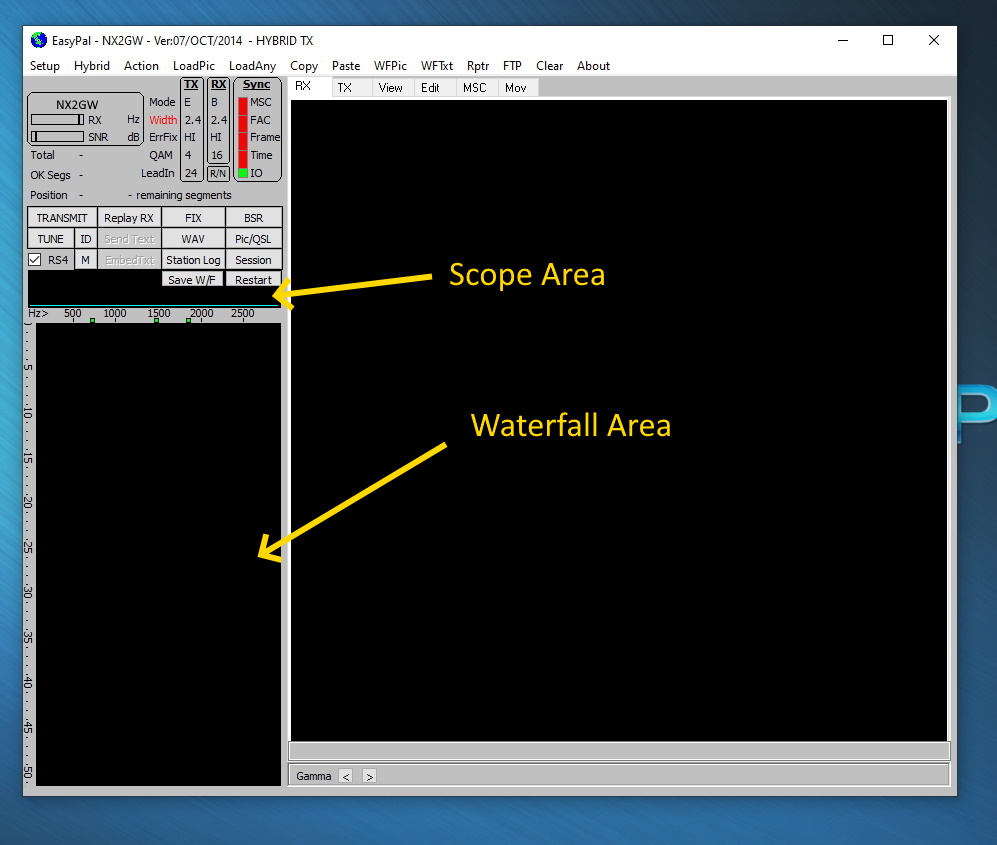
When you open EasyPal, you will see 4 panes within the window and a menu bar above with 13 options. Here we are only interested in the Setup, Hybrid and Action tabs.
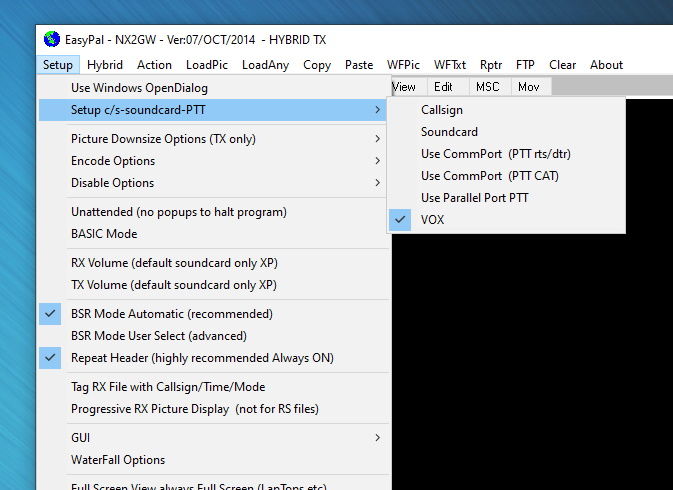
Clicking 'Setup' will bring up several choices. The second choice is 'Setup c/s-soundcard-PTT'. Hover over this choice and you are presented a new window with 6 choices.
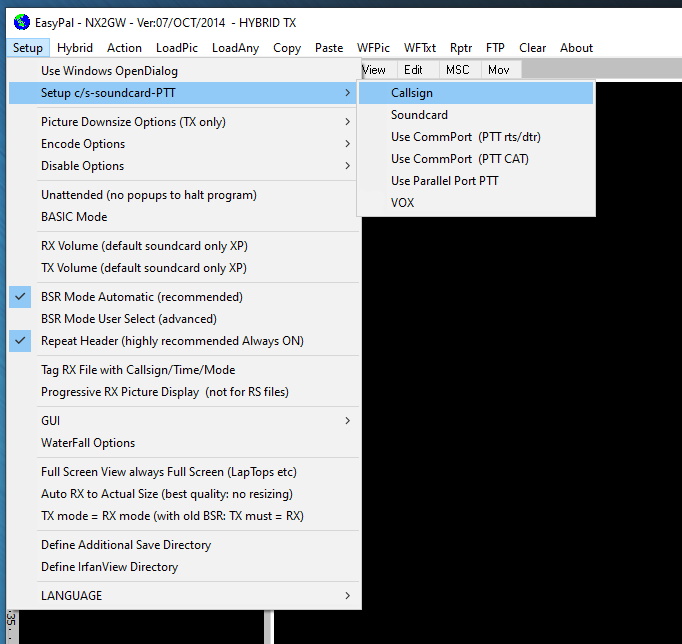
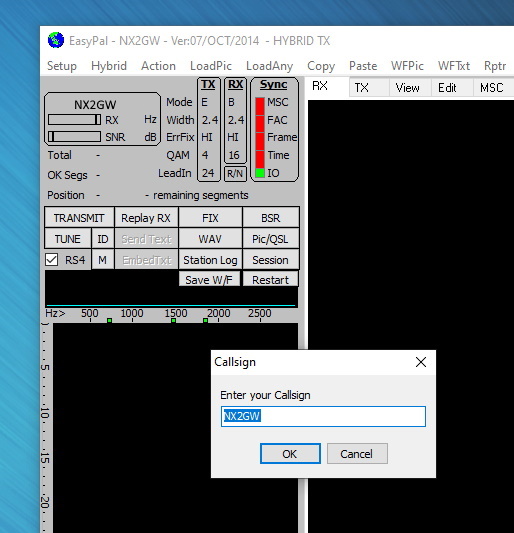
The first lets you enter your callsign.
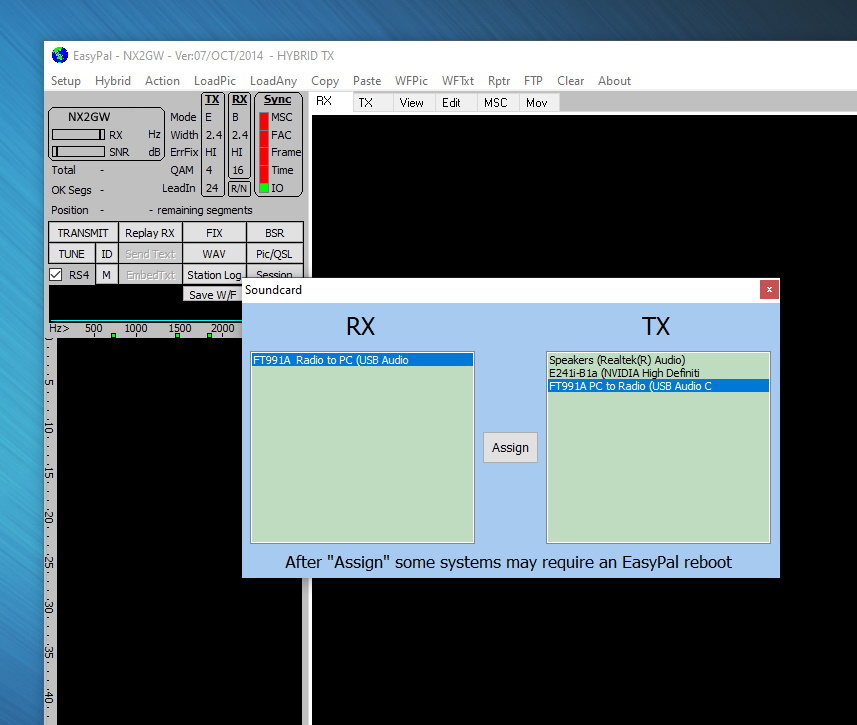
The second is the 'Soundcard' selection. Clicking on this will bring up another window where you select the USB connections to the radio. If you renamed your USB audio ports you should see the names listed here. If not you will see something like 'USB Audio CODEC' under RX and TX. Click to select them and then click on Assign. The window will close.
The last 4 choices control the keying of the transmitter. Click on VOX because we enabled VOX for Data in the FT-991.
We will NOT be using the CAT function to key the radio.
Clicking the 'Hybrid' tab brings up 5 choices. Click 'HYBRID' and a new window 'User Defined Server' will open. The first 3 boxes should be filled in as follows.
Web Address | upload.easypal.org |
User Name | easypal |
Password | easypal |

Click 'USE' and the window will close.
There are no other Menu choice changes necessary for basic operation.
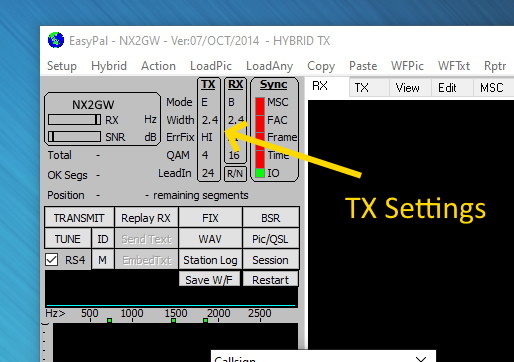
Lastly we need to check some fields in the gray area, upper left. You will see two columns marked 'TX' and 'RX'. To their left are the setting Names.
Clicking on each Name will advance through its 'TX' settings. Mode E, Width 2.4, ErrFix HI, QAM 4, LeadIn 24
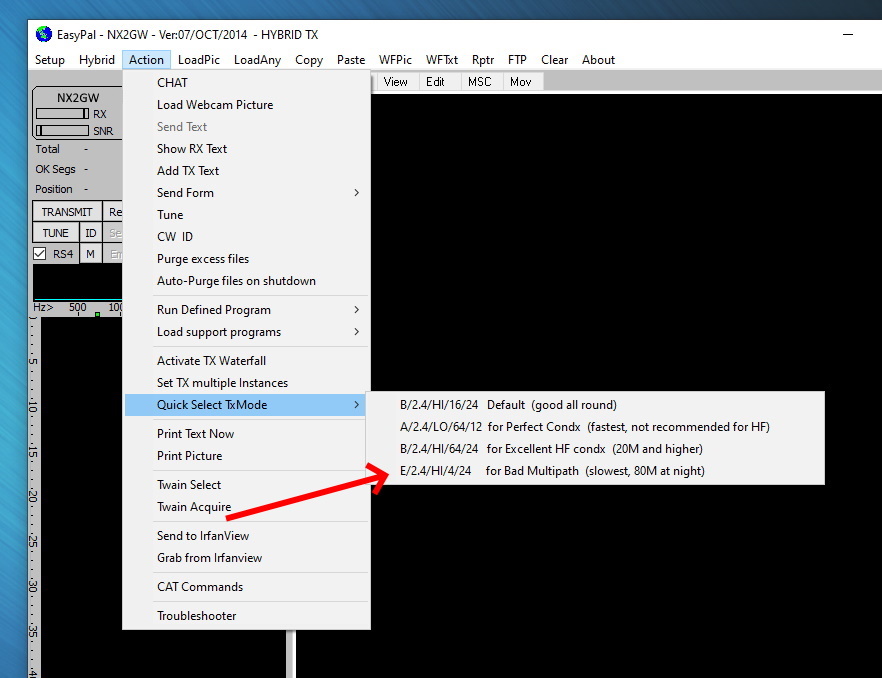
Another way to make the TX settings is by clicking the Action Tab on the Main Menu which opens a new window.
In that window hover over 'Quick Select TxMode' which will bring up a second window.
There click on the forth option 'E/2.4/HI/4/24'.
With any luck this procedure will get you up and running. Please note that it is specific to the FT-991A but with some tweaks will probably work with other radios connected with USB and similar features.
This procedure is intended to be used on 6 meter, 2 meter and 70 cm FM and would require some changes to the radio options to work on HF.
EasyPal was created to work on earlier version of Windows and like most Free software was probably a 'Work in Progress'. As such there appear to be a few Bugs that we will have to live with since development has ceased.
I should note that I am running EasyPal under Windows 10 on a modern desktop computer. The PC is connected via USB cable to the Yaesu FT-991A radio.
Try the gain settings mentioned above (marked with an asterisk *) first as this is a digital system and there should be little variation from one setup to the next.
I have found that I can only send a picture once. Trying to resend it results in keying the radio but no image appears at the far end. This may be unique to my PC.
This is most definitely a BETA procedure so I would appreciate any comments and or corrections you may have.
Garret Wikoff NX2GW
315-695-4271
wikoffg@windstream.net